Web UI
InSARHub includes a built-in web interface that lets you run the full InSAR workflow from a browser — no Python scripting required.
Launch
After installing InSARHub, start the web server with:
Then open http://127.0.0.1:8080 in your browser.
Options:
insarhub-app -w /data/bryce    # set working directory
insarhub-app --host 0.0.0.0   # expose to your local network
insarhub-app --port 9090       # change port
insarhub-app --version         # print version and exit
The -w / --workdir flag pre-sets the working directory so you do not need to configure it in the Settings panel after launch. If omitted, the directory where you run insarhub-app is used.
Running on HPC
InSARHub backend is hosted by FastAPI which means you may run backend on HPC and use port forwarding to open the frontend on you local machine
Steps:
- Install the Remote - SSH extension in VS Code
- Connect to your HPC login node: Connect to Host → + →
user@hpc.example.edu - Open a terminal in VS Code (now running on the HPC) and start InSARHub:
- VS Code detects the open port and offers to forward it — click Open in Browser, or manually add port
8080under Ports tab - Open http://127.0.0.1:8080 in your local browser
The UI runs locally in your browser; all data, processing, and file I/O happen on the HPC node.
Submit node vs login node
When start insarhub-app on a login node. We recommend to use HPC mode in the Processor and Analyzer panels to submit processing steps as sbatch jobs to the cluster. Or you may causing admin ban due to stress of login cluster.
Interface Overview
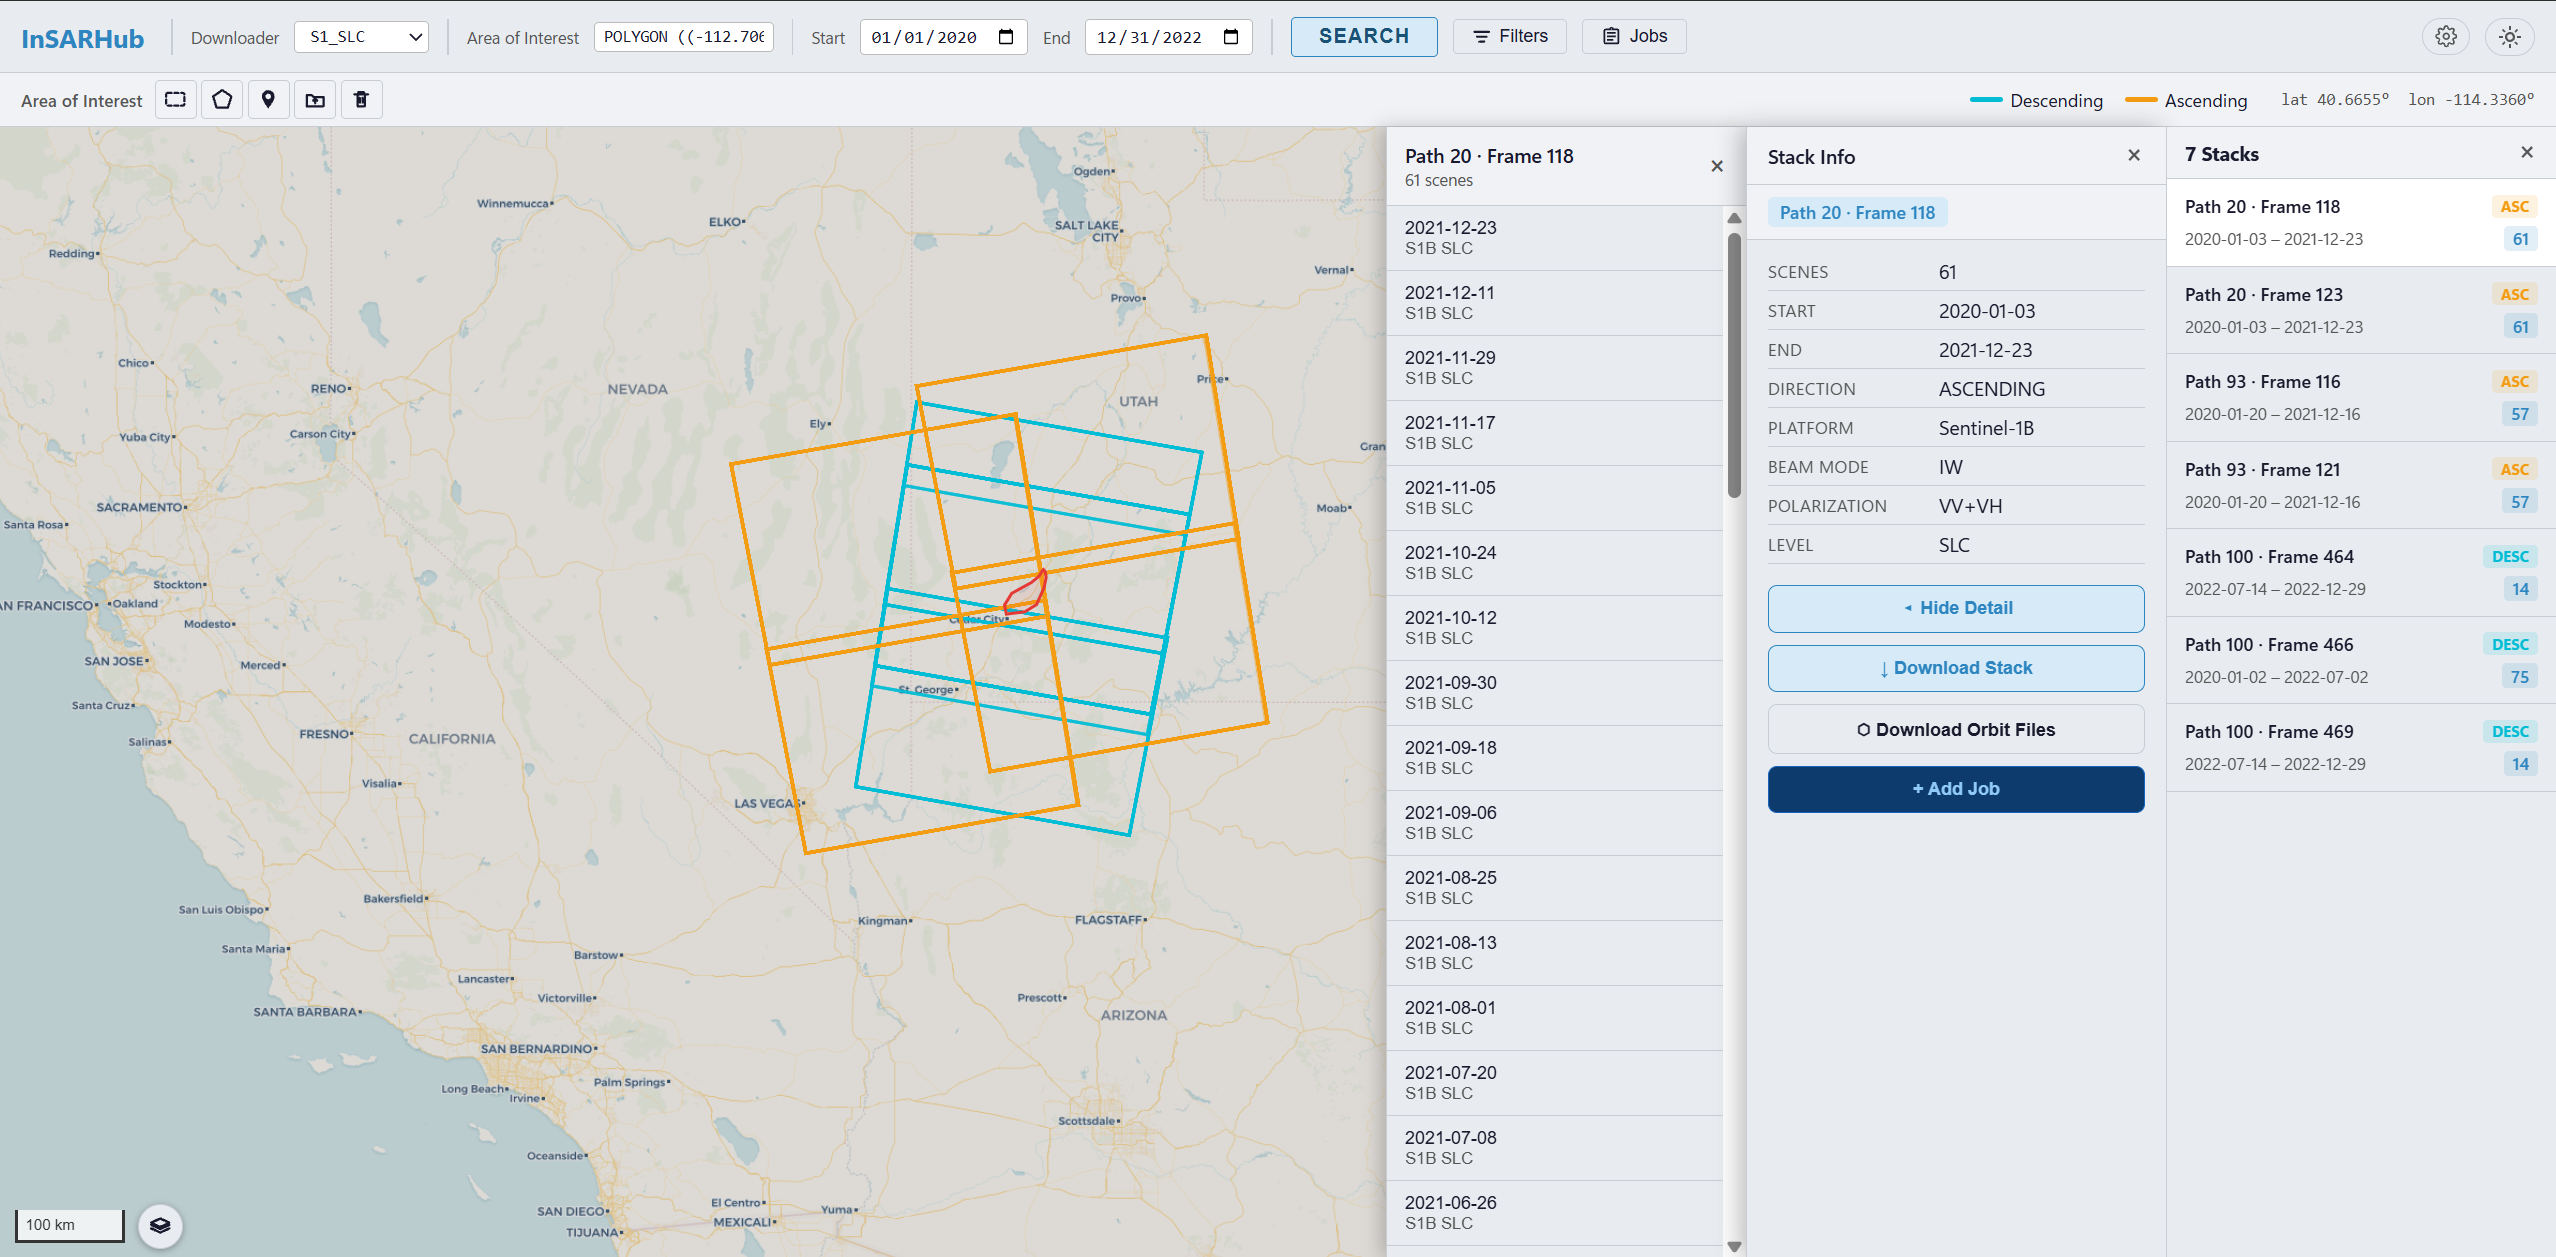
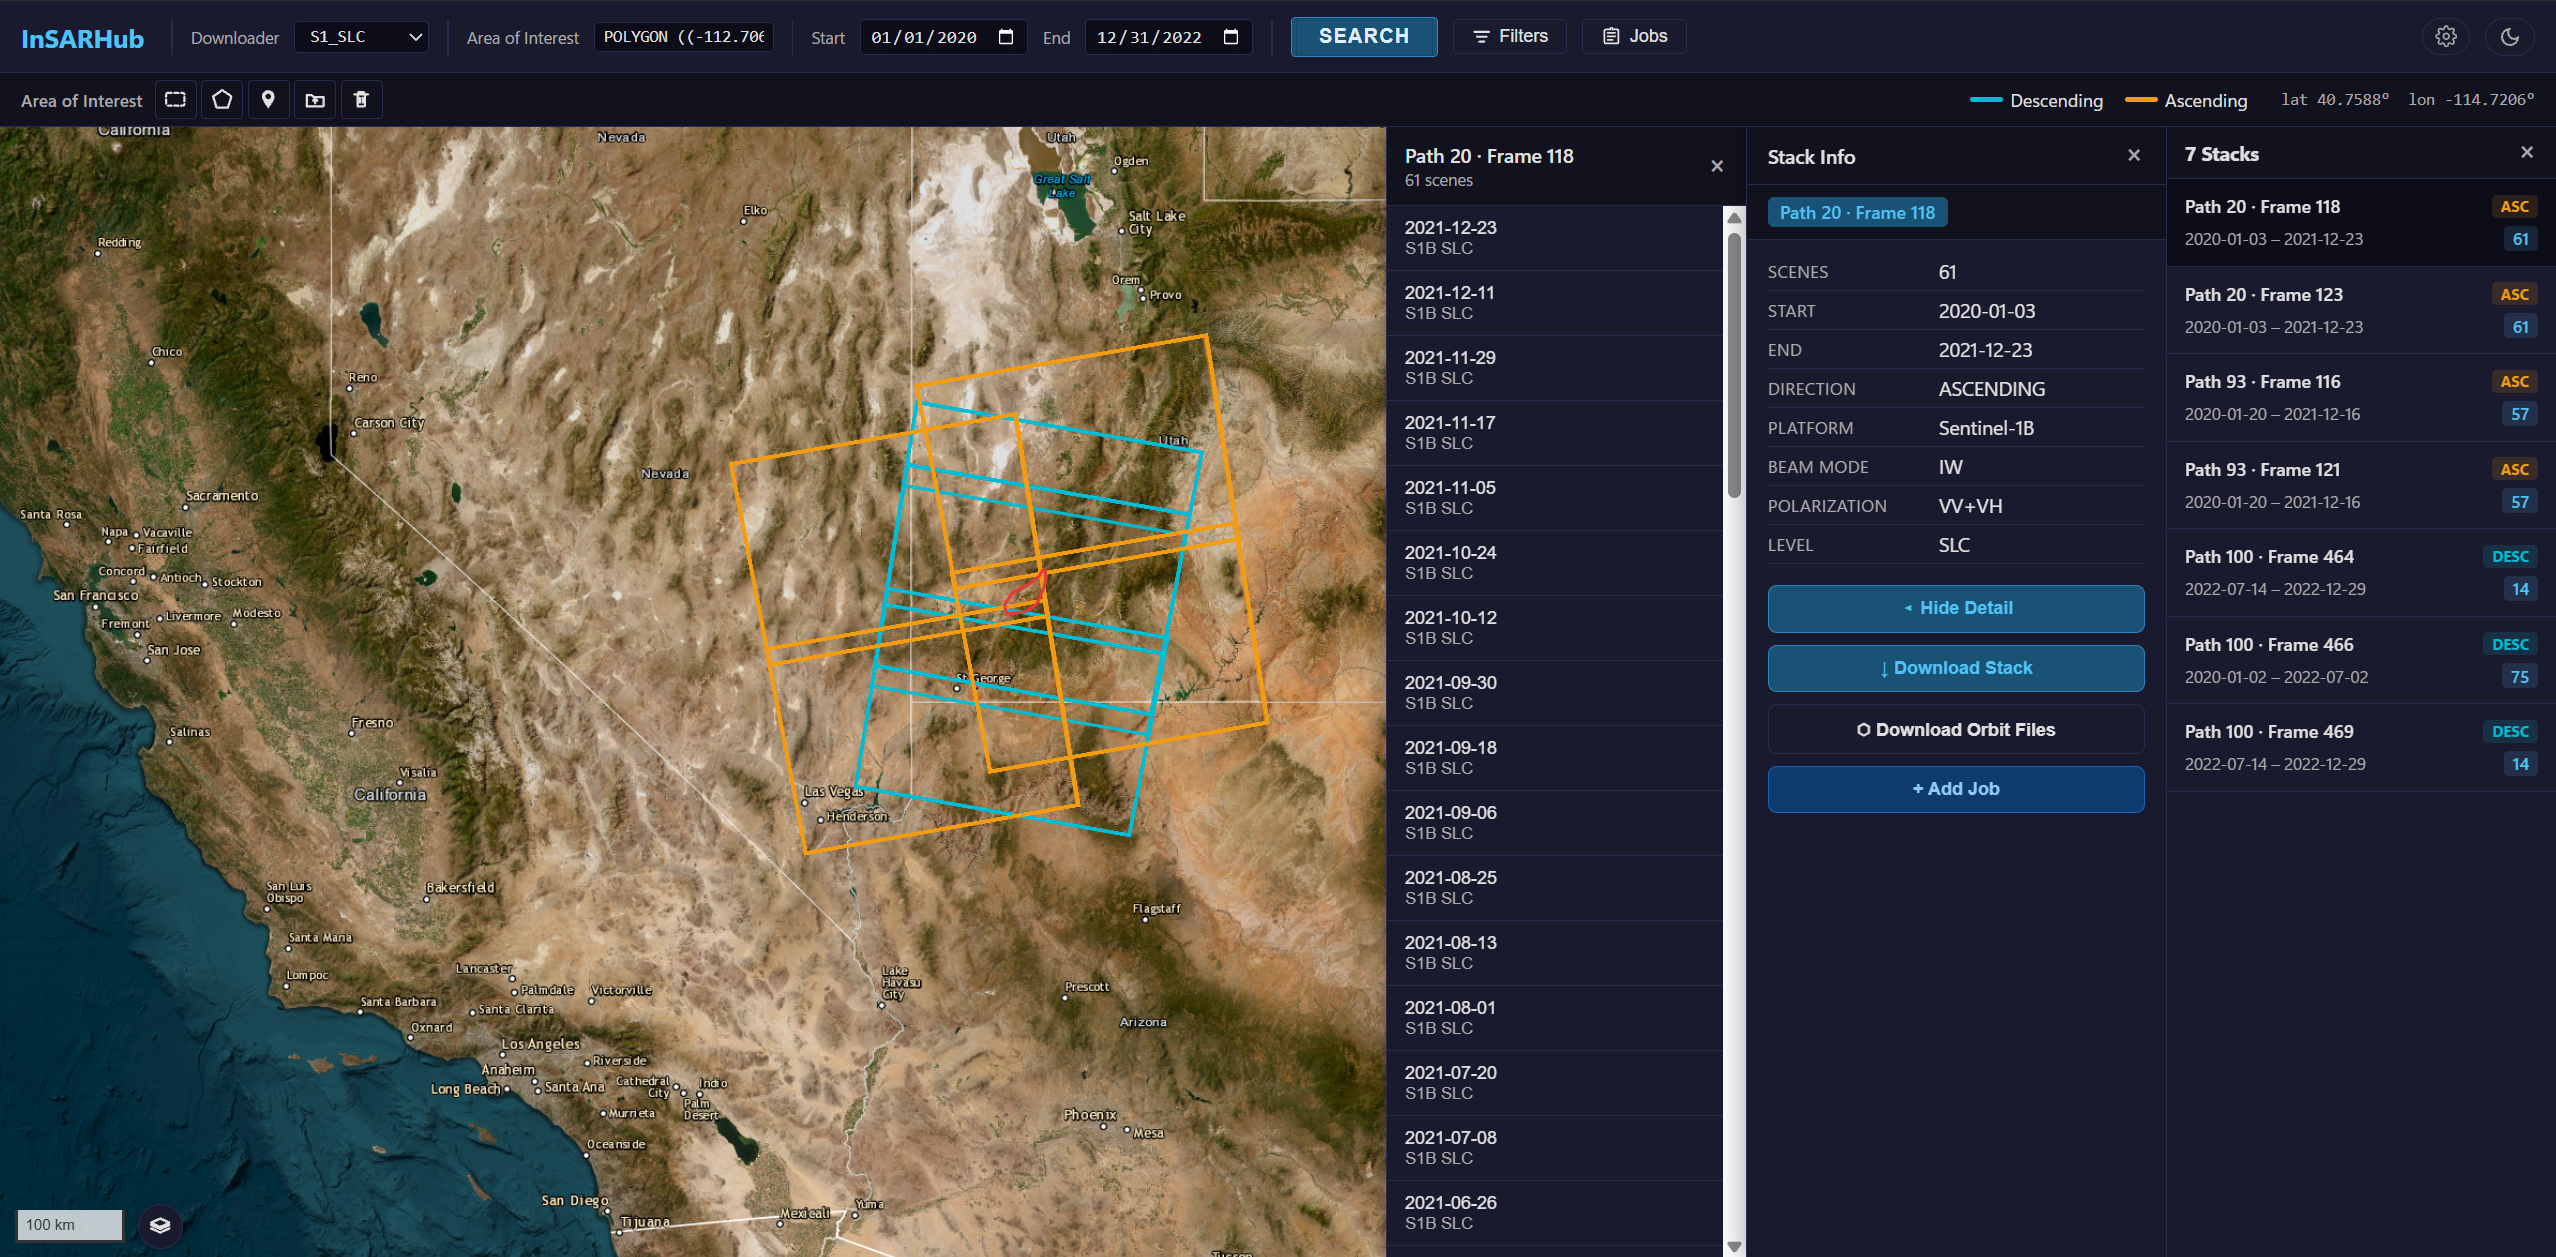
InSARHub Web UI — map, toolbar, and job panel.
Top Bar
The top bar contains the main search controls:
| Control | Description |
|---|---|
| Start / End date | Date range for SAR scene search |
| Search | Run an ASF scene search for the current AOI |
| Settings | Open the global settings panel |
| Jobs | Open the Job Folders drawer |
| Theme | Toggle dark / light mode |
Drawing an AOI
Click one of the draw tools on the left side of the map:
| Tool | Behavior |
|---|---|
| ⬜ Box | Click once to set the first corner, move mouse to preview, click again to finish |
| ⬡ Polygon | Click to add vertices, double-click to close |
| 📍 Pin | Click to place a point |
| 📂 Shapefile | Upload a .zip shapefile |
Click the active tool again to cancel drawing.
Map Navigation
| Action | How |
|---|---|
| Pan | Right-click and drag |
| Zoom | Scroll wheel or use the +/− buttons |
| Click footprint | Left-click to select and view scene details |
Search & Results
- Draw an AOI on the map
- Set a date range in the top bar
- Click Search — scene footprints appear on the map as colored outlines
- Click any footprint to view scene details (path, frame, date, polarization)
Settings
Click the ⚙ Settings button to configure:
- General — working directory, download workers
- Auth — Earthdata and CDSE credentials
- Downloader — downloader type and parameters
- Processor — processor type and parameters
- Analyzer — per-analyzer config (each analyzer type stores its own settings independently)
Job Folders
Click Jobs to open the Job Folders drawer. InSARHub scans your working directory and lists all subfolders that contain recognized workflow files.
Each folder shows clickable role tags:
| Tag | What it means |
|---|---|
| Downloader | Folder has a downloader_config.json |
| Processor | Folder has a hyp3_jobs.json |
| Analyzer | Folder has a mintpy.cfg |
Click a tag to open that role's panel. Click 🗑 to delete the entire job folder.
Next Steps
For detailed usage of each panel, see: